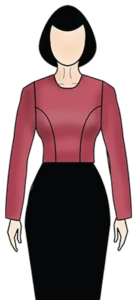
How to manipulate the Basic Knit Dress Pattern Block into a Sewing Pattern
For Pattern Makers & Designers
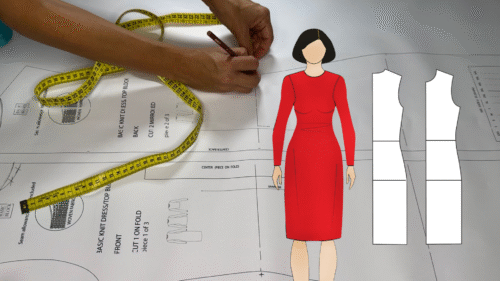
Want to transform your basic knit dress pattern block into a custom sewing pattern? In this step-by-step tutorial, you’ll learn how to modify the neckline, shoulder, waist, and hem to fit your vision—then turn your block into a complete pattern with seam allowances. Whether you’re designing for yourself or developing patterns for others, this guide will help you master the fundamentals of pattern manipulation with precision.
What this tutorial includes?
Together, we will manipulate step by step:
the neckline, the shoulder line, the waist, the hem length
of the basic knit dress pattern block
and then add seam allowance to make it a complete sewing pattern.
Point of Reference
First you have to find a reference to the pattern and on your body to make the measurements and cross check.
To find this point on your body use a measuring tape to connect your shoulders and point with your finger in the middle.
This is the spot. The center of the neck base.
To mark the same spot on paper extend the line at the center front up. Then draw a vertical line from the shoulder edge to meet the firs line.
This is the mark. Repeat for the back pattern.
Neckline
From the point of reference measure down to the neckline.
Then repeat this measurement on your body. Looking at a mirror you can decide if you want the neckline lower or higher.
Measure on your body the desired depth of the neckline. Repeat on paper from the point down following the center front line. Make a mark.
Now measure the pattern from the point towards the shoulder. Check on your body and see if you want it wider or closer.
Transfer on paper and make a new mark.
Now, draw a curved line following the natural body curve to connect these two marks.
Erase the previous line or draw little X marks on it in order not to get confused later.
Shoulder line
Measure on paper from the neckline towards the shoulder the width of the shoulder line.
Check the measurement on your body and decide if you want it thinner or wider. Adjust on paper.
Remember: adjust the back pattern too in order to match the shoulder lines.
Waist
Our patterns have a regular fit. If you want it closer to your body, reduce the waist from the side seam. If you want a more relaxed fit add more at the side seam, at the waist line height.
Remember: the ease you will add will be doubled in the final garment since you are working on half a pattern. For example, if you add 1 cm, when the cut garment unfolds it will be 2 cm (one at the left side and one at the right).
Hem
The Basic Knit Dress standard hem is at knee length.
Measure on your body from the waist down keeping both your legs straight and without bending. (You better ask somebody else to take this measurement).
Transfer the desired length to the paper.
Drawing the final Pattern Block
Use a marker to draw the final pattern block.
Adding the Seam Allowance
Using a pencil again mark the seam allowance as following:
Neckline: 3 cm ( flip this inside instead of sewing it in order to keep the elasticity of the fabric)
Shoulder line: 1 cm
Waist: 1 cm
Hem: 2cm
Center front & Center back: none as this part will be cut on fold.
Drawing the final Sewing Pattern
Use another colored marker to draw the final sewing pattern.
Cut the paper. You are ready to cut on fabric.
Remember: this is just a tutorial. You may alter every measurement to fit your desired sewing pattern. Use this as an inspiration to manipulate your own slopers.
Watch the Tutorial: Basic Knit Dress Pattern Block Manipulation
See the Process Step by Step
This video walks you through how to modify the neckline, shoulder line, waist, and hem of your basic knit dress pattern block. If you prefer to follow visually or want to pause and replay each step, the full demonstration is right here
You’ve just created a personalized sewing pattern from a basic knit dress block—customized to your exact preferences. From neckline to hem, this process gives you complete control over fit and style. Keep practicing different manipulations to build your confidence and expand your patternmaking skills.
Want to explore more ways to elevate your sewing patterns? Check out our Ready-Made Pattern Blocks and Editable PDF Sewing Patterns to streamline your design process. Need more help? Visit our FAQ page or get in touch through our Contact page. For more tutorials like this one, head over to the Knowledge Base or browse the full Blog.